2D character rigging and animation has become a very prevalent technique for all types of animated videos, especially explainer videos. It is sure that it will take time、energy and effort to make a satisfying character. The good news is that there are a great many of character making software for you to choose and it is expected to spare you from exhaustion using these tools. Mango Animate Character Maker is among these tools that can facilitate animated character making process. It is software that can turn a static image into a vivid cartoon character. It is useful and easy to master for both beginners and professionals. Now let’s talk about how to make 2D character rigging in 5 minutes.
- Step1: Preparation
Before creating an awesome and unique cartoon character, you should get everything ready. First of all, you should download Mango Animate Character Maker by hitting the download button on its homepage, and then the 2D rigging software is at your disposal. What’s more, you should prepare the prototype of the character that you want to make, that is, to design the unique role image ahead of time.
- Step2: Rigging the 2D character
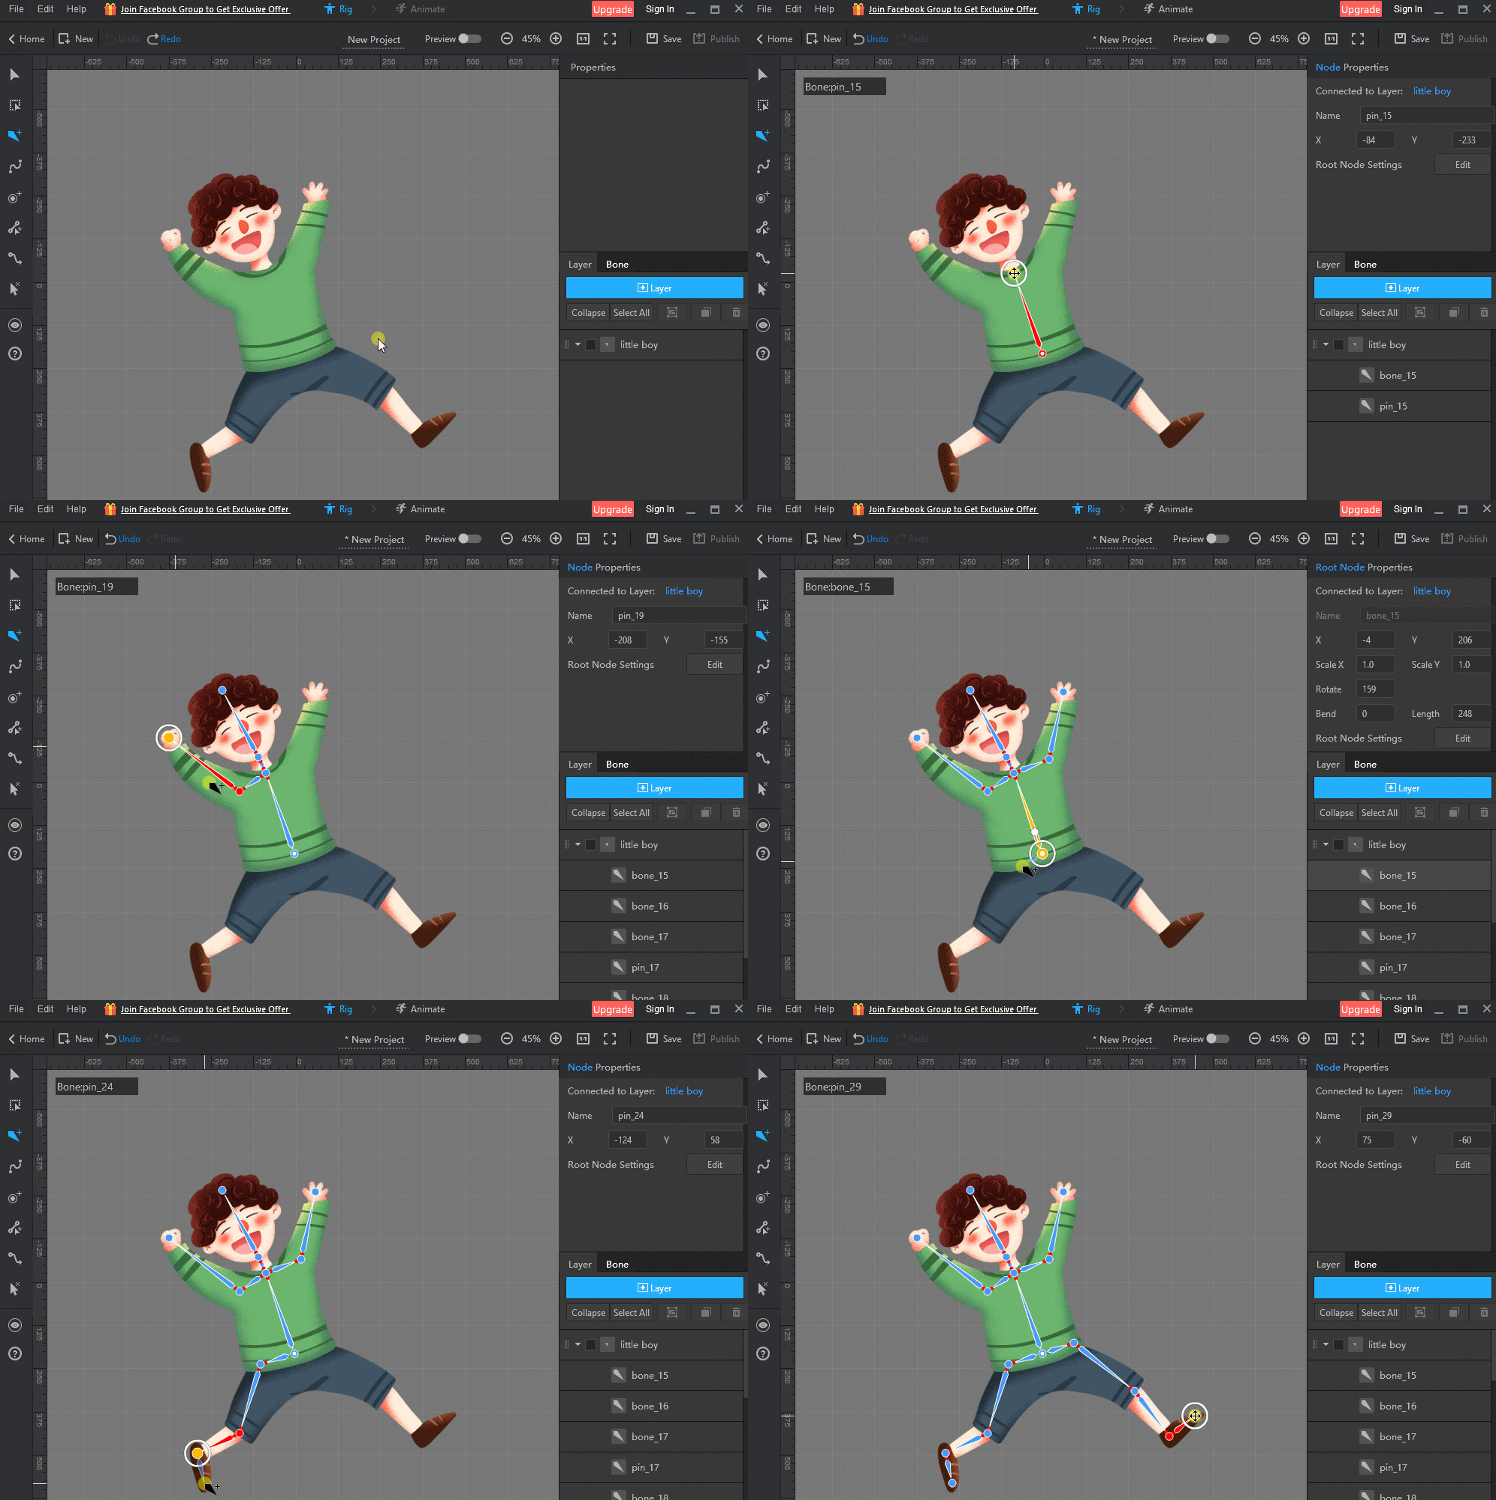
When you get both the software and the character ready, it is time to open the software. There are three steps to rig the 2D characters. In the first step, you should import the image into the software by choosing the type of files you want to input. Mango Animate Character Maker provides three ways for you to create a new project, including creating from templates, from images (PNG &PSD), from the existing project. Just click the file type of your character, and then it can be imported successfully to the 2D character rigging interface where you rig the characters. In the second step, you add bones to the character using the bone-adding tools. There are two kinds of bone-adding tools for you to choose, one is to add straight bones and another is to add curved bones. Usually it needs to add curved bones at the turn of a joint which would make the movement more fluently. The core rule of rigging is that whichever part your character needs to move, you add bones there. When you are done with the rigging process, you can take the next action. The final step is to preview the movement of the character. Turn on the preview button at the right top of the interface, and you can move the bones to see if it meets your expectation. Whether there are more bones needed to add or extra bones to delete, you can always find the bone-adding tool and the bone-deleting tool at the left side. At this step, you can also adjust the angle of two connected bones and even change the outfit、hair、hands、feet、face and so on to make the character more perfectly. When you done with these steps, the next thing you would do is to make the 2D rigging character live.
- Step3: Animate the 2D rigging character
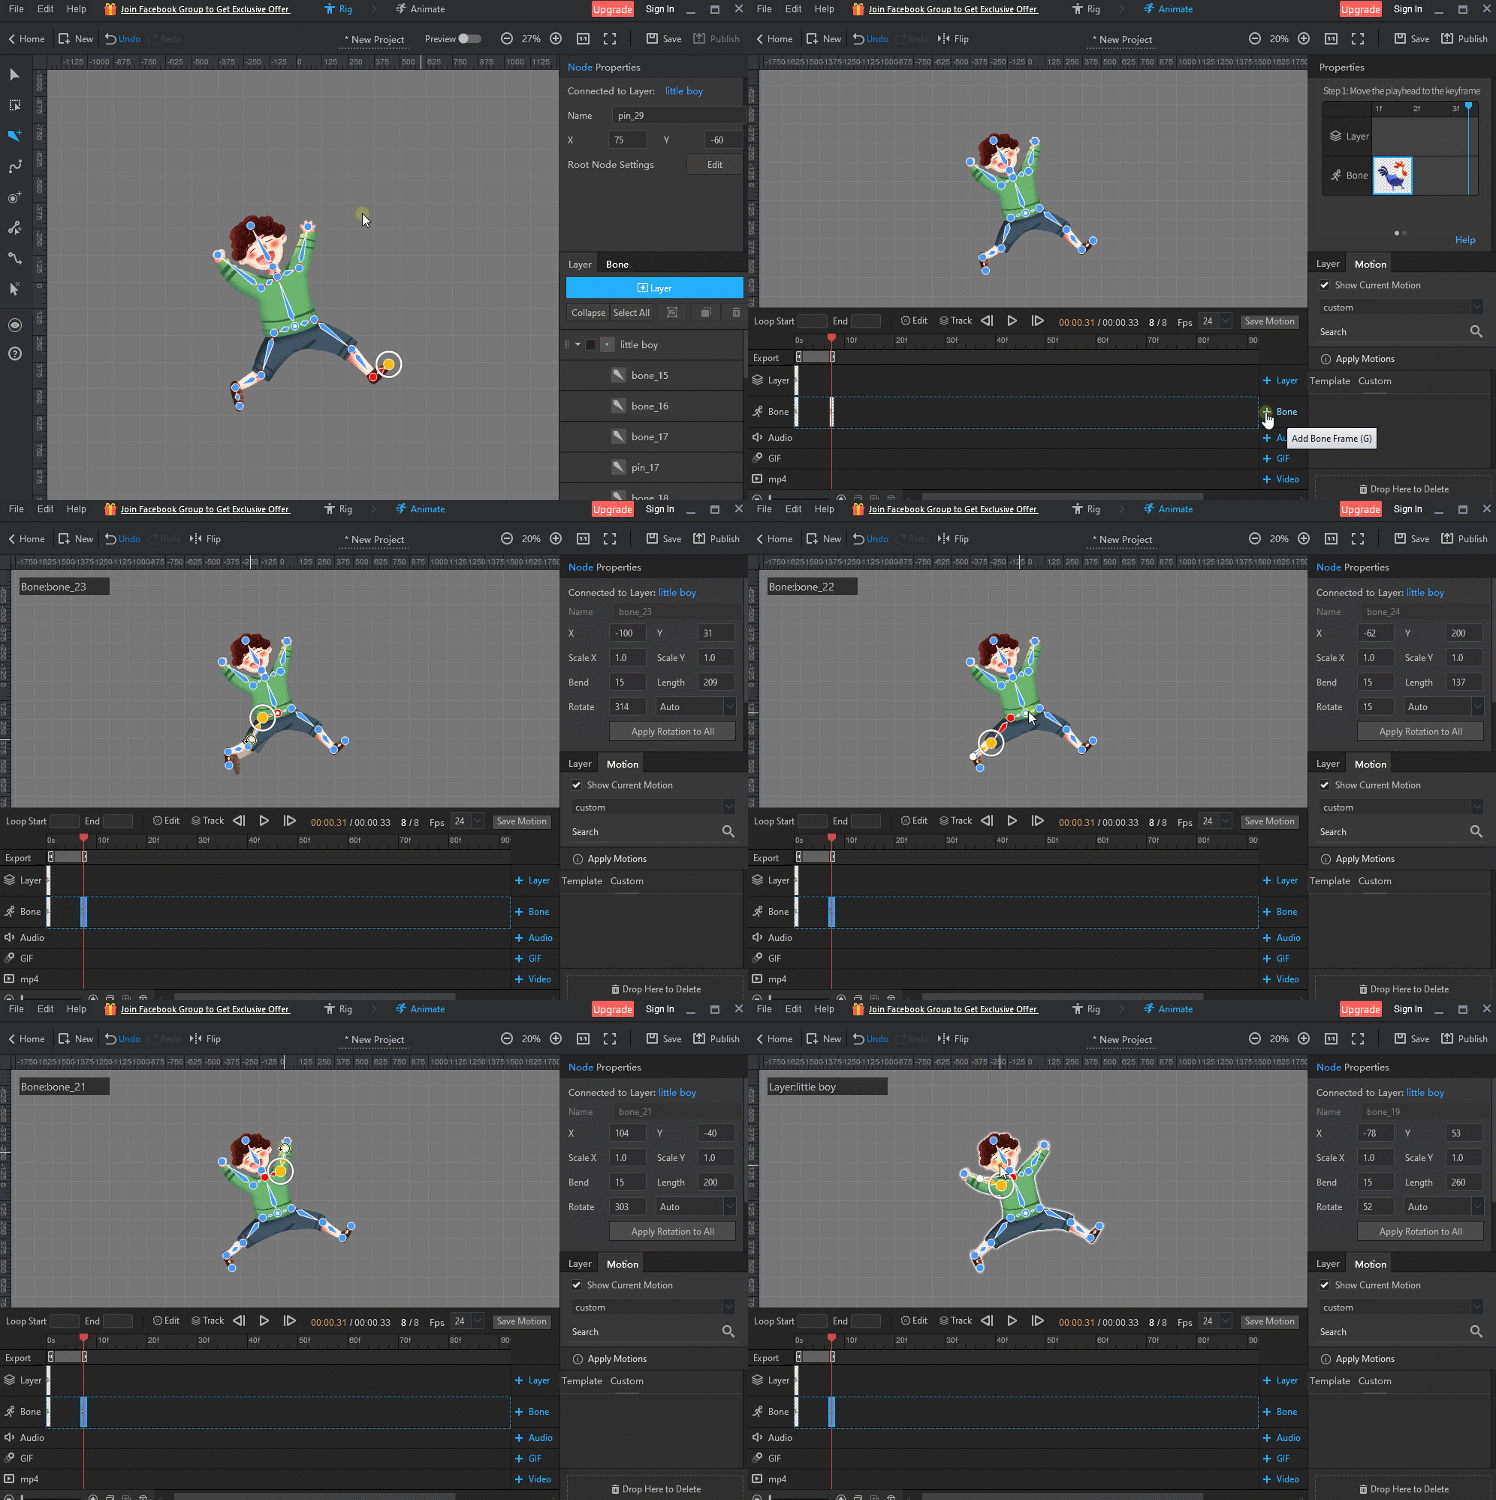
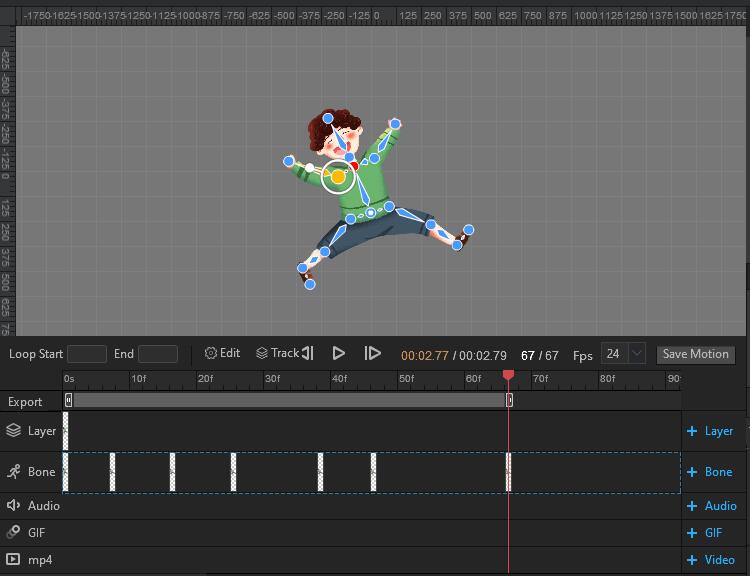
If you want to give life to the 2D rigging character, you should think about these two questions: what movement I would like the character to make and what the movement comes into being in daily action. When you make these questions clear, you can start animate the 2D rigging character. Click ANIMATE at the top of the interface to enter animation part. Think about the key postures of the movement and then add the core flames in the timelines accordingly. Adjust the bones to achieve a certain kind of posture. Then hit the preview button to see if it has met your expectation. If not, you can still make modification until it reaches the standard.
- Step 4: Publish and share
When the 2D rigging character is made perfectly, it is time to export it in different formats provided by Mango Animate Character Maker and share it with your friends or use it in your animated video.
In Conclusion
2D rigging and animation has become a popular skill among people around the world. You may think it hard to get hand of this skill. However, it is actually quite simple if you use the right tool, Mango Animate Character Maker, for example. So now, take action,if you want your favorite 2D rigging character to come to life.


